
Nautobot Jobs
Your Custom API Endpoint
One of the best features of Nautobot as a Network Automation Platform is the ability to create your own custom code. This is executed via a job. What makes Nautobot unique is its ability to integrate with a Git repository to get those jobs and code for use into Nautobot. This provides perhaps the simplest, authenticated, and logged methodology for building your own API endpoints.
Nautobot supplies an API endpoint to start execution of jobs. The big deal about why you would want to do this inside of Nautobot (even if you do not have any other data inside of Nautobot, but you should add data, it is a perk) is that you get an authentication mechanism with the Nautobot token setup and a logging mechanism. With Nautobot user accounts you can create tokens that will handle the API authentication. This is helpful that you do not need to add that into your own Flask, FastAPI, or Django application yourself. This is the same for the logging mechanism. Every job execution provides a log of the execution and the result.
In this post I'm going to walk you through adding an API endpoint using the Git synchronization capabilities of Nautobot. This will provide a mechanism to add users to a Meraki organization. This is meant as an example. You can definitely look to leverage this in your own Nautobot install as well.
Creating Your Job
There are three options for creating Jobs within Nautobot.
- Adding a Python file to the Jobs Root directory
- Using a Git repository to sync the job to Nautobot
- Creating a Nautobot App (plugin) that leverages a Job
Creating Your Git Repository
You can use any Git service that Nautobot has access to, and currently requires the repo to use a HTTPS endpoint. For this particular job setup, this will be hosted on GitHub. See the Nautobot docs for git as a data source for more details on setting up the Git sync. The following settings are used:
For the Git directory, the structure is going to look like the following:
❯ tree
.
├── jobs
│   ├── __init__.py
│   └── meraki_users.py
└── README.md
The jobs directory is required. This allows for the Git data source to have multiple data sources, for creating your job, this is required. The __init__.py file is also required for the jobs to be synced properly. The meraki_users.py file is a file that I have chosen to make. This is where the Job class will reside. This can be any file name that you wish. The README.md is not required for the jobs to work. This is good documentation.
Creating the Nautobot Git Source
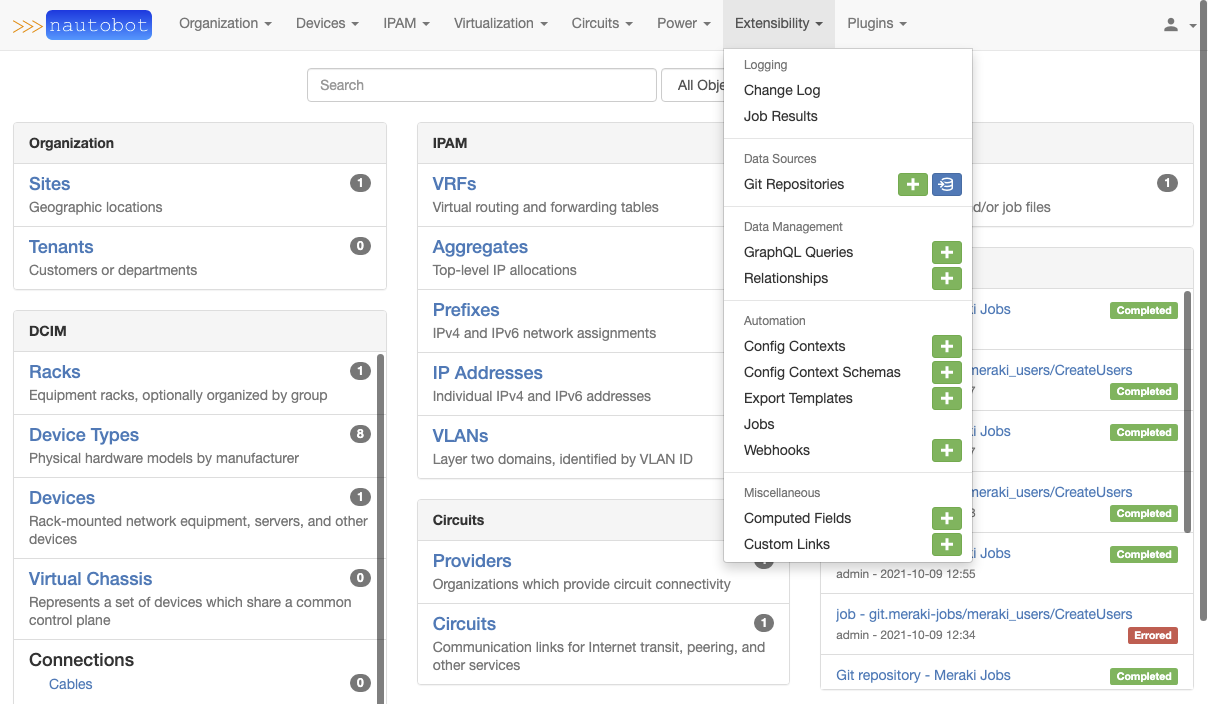
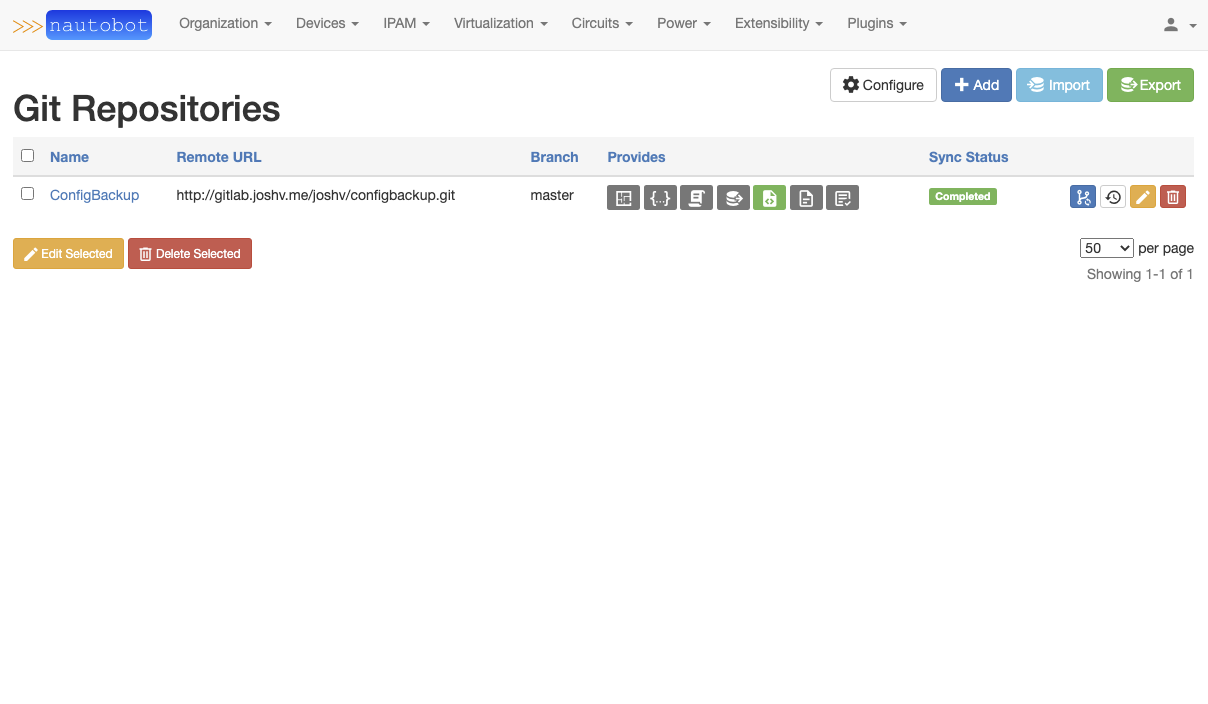
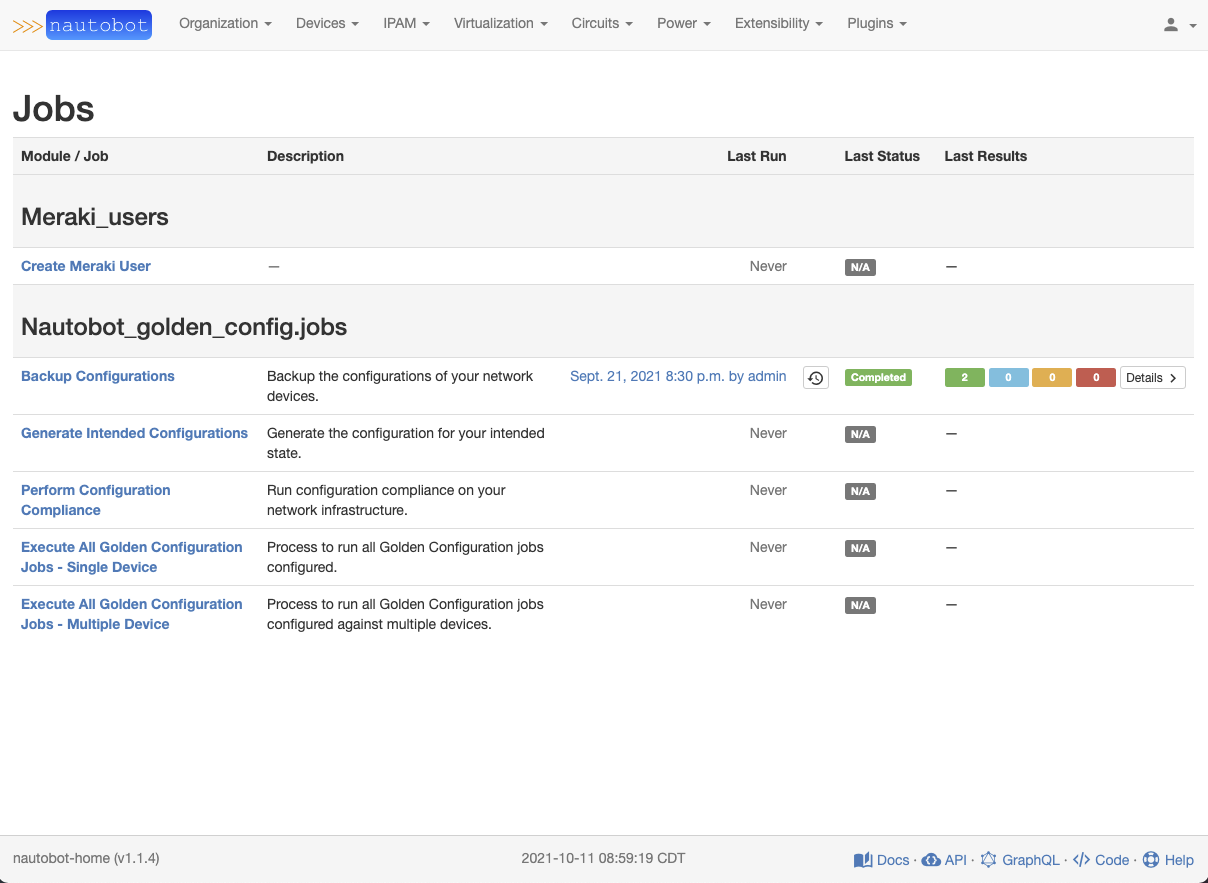
Navigate to Extensibility -> Git Repositories. Select + Add button on the upper right of the section. Fill in the information, with the required fields in bold. If user authentication is required for the Git repository (such as a private repo), then you need to use a Personal Access Token (PAT). Once you click Create a synchronization will occur that will sync the jobs from the Repo. Navigate to the Extensibility -> Jobs section. You will now see the jobs included on the page.
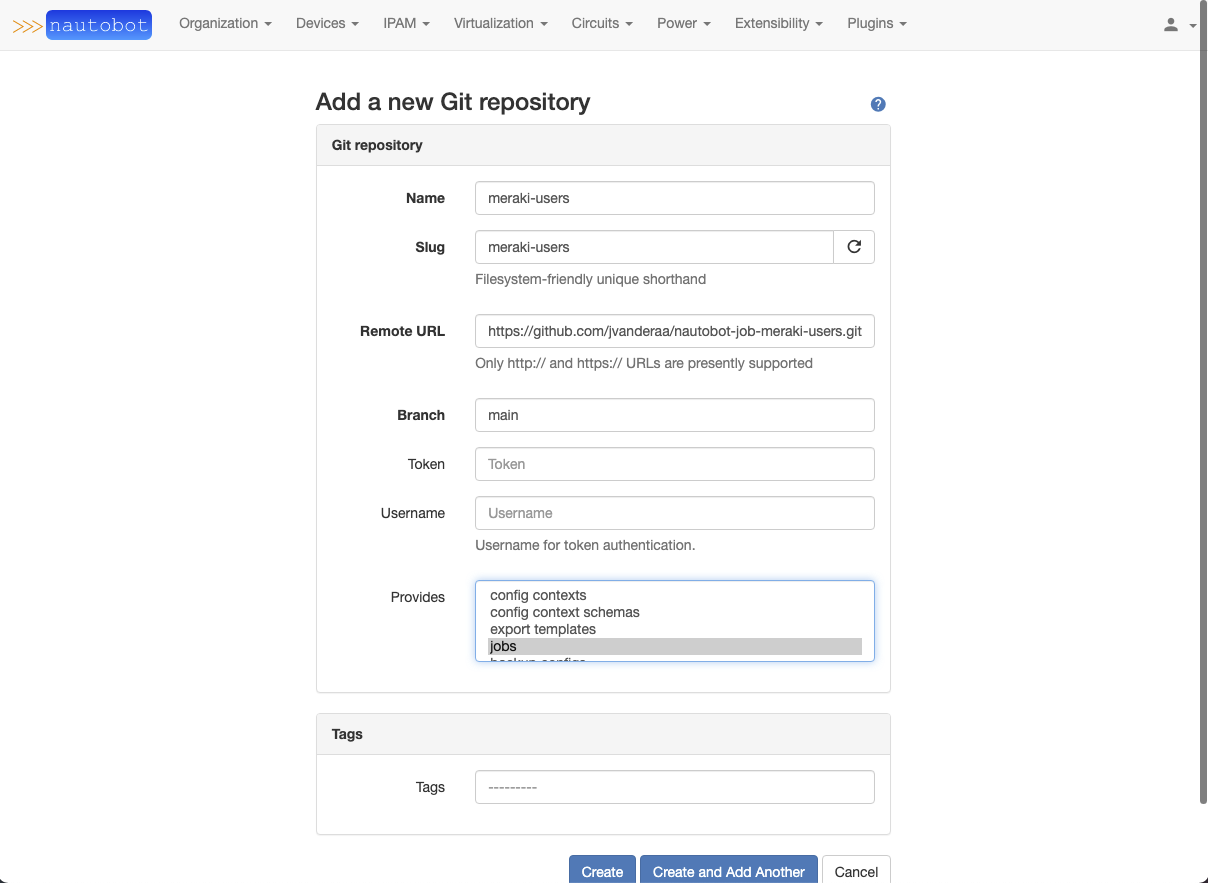
For the Meraki Users jobs that are being setup, I am using two environment variables to control the environment.
MERAKI_DASHBOARD_API_KEYfor the API key to use to talk to the Meraki Dashboard.NAUTOBOT_JOB_MERAKI_EMAIL_VALIDATION_REGEXwhich is the regex string to do validation on email within the form. This defaults to allowing all if not set.
Writing the Code
Job Form and Vars
Once the git repository is setup, and you have seen what the interface to get the Nautobot environment to sync to the repository it is on to writing the code. You define your class that will inherit from the Job class. With that in place, the first thing you define at the class level is the variables to display on the form. There are many types of variable inputs that the Job form will display. This is just a few from the example provided:
class CreateUsers(Job):
    """Class to create a Meraki user

    Args:
        Job (Nautobot Job): Meraki create user job
    """

    user_email = StringVar(
        description="User Email to add",
        label=f"User Email, regex: {EMAIL_REGEX}",
        required=True,
        regex=EMAIL_REGEX,
    )

    meraki_access_level = ChoiceVar(
        description="Level of access",
        label="Access Level",
        choices=(
            ("full", "Full"),
            ("read-only", "Read Only"),
            ("enterprise", "Enterprise"),
            ("none", "None"),
        ),
    )
The user_email is a StringVar, that is a single line that will be presented. One of the options on the StringVar is the capability to complete a Regex validation. This is done with the regex key and provide it a regex to validate the response. This will provide the appropriate validation before launching the job. The meraki_access_level is a ChoiceVar that allows for multiple choices. This has a tuple type that is fed and provides for the value that is being provided as the first item in the tuple, and the display value on the second part of the tuple.
The various types of vars that can be displayed on a job form can be found within Nautobot's code. The pre-defined Variable options are:
- BooleanVar
- ChoiceVar
- FileVar
- IntegerVar
- IPAddressVar
- IPAddressWithMaskVar
- IPNetworkVar
- MultiChoiceVar
- MultiObjectVar
- ObjectVar
- StringVar
- TextVar
Job Meta data
The job section provides for a Meta class that will help to define data about the job class. This is where you can set a name, description, commit default setting, field order, and if this is read only or not.
Job Code
Once the form has been defined and the meta data has been provided, you can add the run function. This is what gets executed. The first part of the Job execution, while not necessary, can be helpful is to assign the data coming in.
def __init__(self):
        super().__init__()
        self.data = None
        self.commit = None

    def run(self, data, commit):
        """Run execution

        Args:
            data (dict): Data from the form
            commit (bool): Commit changes to the database
        """
        self.data = data
        self.commit = commit

        if self.commit is False:
            self.log_info(obj=None, message="Commit set to False")
            self.log_info(obj=None, message=f"Data pushed in: {self.data}")
            return
Inside the class initialization the data and commit objects are created and assigned None. Inside the run, data and commit kwargs are passed in. The data key maintains the data from the form that was filled out. This is a dictionary that contains the data passed in. If using an ObjectVar type from Nautobot, the objects will be what come over. The commit key is a boolean true/false should the job be making updates to the Nautobot database.
This is the key part then in the run section. You can interact with other systems, such as in this case the Meraki Dashboard. As long as you can write Python to interact with the system, then you can have the Job execute the work. Of note here, those remote systems will have execution completed, even if commit is set to False. So you will need to put some logic into your class to handle commit to remote systems.
API Details
API EndPoint
There is an API endpoint that is created when using Jobs to launch the jobs. This varies depending on the method that was used to load the Job into Nautobot. The base is https://nautobot.example.com/api/extras/jobs/. The next component of the API URL is the method, with using git, then there is also the data source slug, such as git.meraki-users. The slug is what is used on the right portion of the . in the section. Then you add the file name to the URL endpoint, and lastly the class name. The last section of the endpoint is /run/ knowing that this is the run endpoint.
API Execution
The following execution, which was created with the Postman code snippet, shows what an execution would look like to launch a job. The two keys in the dictionary to pass to the endpoint are commit and data, just like what is passed into the class method. data's value is a dictionary that has key/value pairs for each of the job fields, with the variables matching the Job UI variables.
import requests
import json

url = "https://nautobot.example.com/api/extras/jobs/git.meraki-jobs/meraki_users/CreateUsers/run/"

payload = json.dumps({
  "data": {
    "user_email": "josh@example.com",
    "user_name": "Josh Testing API",
    "meraki_org_id": "123456",
    "meraki_network": "MN01",
    "meraki_access_level": "full"
  },
  "commit": True
})

headers = {
  'Authorization': f'Token {os.getenv("NAUTOBOT_TOKEN")}',
  'Content-Type': 'application/json',
}

response = requests.request("POST", url, headers=headers, data=payload)

print(response.text)
API Response
The example response looks like:
{
    "url": "https://nautobot.example.com/api/extras/jobs/git.meraki-jobs/meraki_users/CreateUsers/",
    "id": "git.meraki-jobs/meraki_users/CreateUsers",
    "name": "Create Meraki User",
    "description": "",
    "test_methods": [],
    "vars": {
        "user_email": "StringVar",
        "user_name": "StringVar",
        "meraki_org_id": "ChoiceVar",
        "meraki_network": "StringVar",
        "meraki_access_level": "ChoiceVar"
    },
    "result": {
        "id": "d95051bb-4df6-4b45-a8a8-b967d4b3c66c",
        "url": "https://nautobot.example.com/api/extras/job-results/d95051bb-4df6-4b45-a8a8-b967d4b3c66c/",
        "created": "2021-10-09T12:34:42.024410-05:00",
        "completed": null,
        "name": "git.meraki-jobs/meraki_users/CreateUsers",
        "obj_type": "extras.job",
        "status": {
            "value": "pending",
            "label": "Pending"
        },
        "user": {
            "id": "131e7ebb-3f50-48ad-8a64-4a0a077488de",
            "url": "https://nautobot.example.com/api/users/users/131e7ebb-3f50-48ad-8a64-a10a077488de/",
            "username": "test_user",
            "display": "test_user"
        },
        "data": null,
        "job_id": "57a86756-175b-43c8-9b76-1df1340a46e7"
    }
}
The response gives an immediate response that the job status is pending within the result key. The biggest piece of data that is provided is the result["url"] which you can use to get the status of the job. This job result will include the status, completed and start times, the total number of log statuses (success, warning, failure, info).
{
    "id": "bf0405ef-4c1a-491e-a5bf-9d11cbdaa7ad",
    "url": "https://nautobot.example.com/api/extras/job-results/bf0405ef-4c1a-491e-a5bf-9d11cbdbb7ad/",
    "created": "2021-10-11T09:26:27.802264-05:00",
    "completed": "2021-10-11T09:26:30.602580-05:00",
    "name": "git.meraki-users/meraki_users/CreateUsers",
    "obj_type": "extras.job",
    "status": {
        "value": "completed",
        "label": "Completed"
    },
    "user": {
        "id": "131e7ebb-3f50-48ad-8a64-4a0a077488de",
        "url": "https://nautobot.example.com/api/users/users/131e7ebb-3f50-48ad-8a64-4a0a077488de/",
        "username": "test_user",
        "display": "test_user"
    },
    "data": {
        "run": {
            "log": [
                [
                    "2021-10-11T14:26:30.591027+00:00",
                    "info",
                    null,
                    null,
                    "Commit set to False"
                ],
                [
                    "2021-10-11T14:26:30.591682+00:00",
                    "info",
                    null,
                    null,
                    "Data pushed in: {'user_email': 'josh@example.com', 'user_name': 'Josh Vanderaa', 'meraki_org_id': '111111', 'meraki_network': '', 'meraki_access_level': 'read-only'}"
                ],
                [
                    "2021-10-11T14:26:30.592706+00:00",
                    "info",
                    null,
                    null,
                    "Database changes have been reverted automatically."
                ]
            ],
            "info": 3,
            "failure": 0,
            "success": 0,
            "warning": 0
        },
        "total": {
            "info": 3,
            "failure": 0,
            "success": 0,
            "warning": 0
        },
        "output": ""
    },
    "job_id": "0f9e369d-8cdd-4b52-a737-2af1e6c8bb92"
}
Summary
Nautobot is a tool that is well worth the time to look at. The capabilities that are being added to help Network Engineers manage, document, and automate the networks are well worth the investment. The Jobs end point and API endpoint are extremely helpful. And with having the capability to sync from a Git repository makes it easy to get started with an authenticated and logged API.
For more on getting started with several open source network management tools, including Nautobot in this post, take a look at my book on LeanPub - Open Source Network Management.
